Introduction
Everything started some years ago when a colleague asked the community at work about their experience with ergonomic keyboards. The responses were mostly about Microsoft Sculpt keyboards, but someone mentioned Ergodox and Moonlander, which I did not know. I started researching those two and they seemed to be very good keyboards, but unfortunately relatively expensive. I did not want to shell out so much just to try a split keyboard, so I started to dig deeper and to look for cheaper options. And then I fell into the rabbit hole…

As you can see, starting from regular keyboards, I pretty quickly dived really deep into the topic. Ultimately I went back to a little more traditional split keyboards…, but first things first!
Ferris Sweep
Ferris Sweep is one of the first small, affordable split keyboards designs created by David Barr based on Ferris keyboard design by Pierre Chevalier . I got interested in it after watching Ben Vallack’s video on this “ultra-affordable keyboard”:
I downloaded the PCB files for the Sweep Bling LP, customized them a little, and sent them to JLPCB for fabrication. The minimum order quantity is 5 pcs with JLCPCB, so I paid $44.58 dollars for 5 sets of PCBs (left + right).

I then bought the remaining parts: low profile Choc switches and hot-swap sockets, key caps, reset switches, TRRS jacks, power switches, and of course the ProMicro MCU boards. Since this is a small keyboard (3 rows x 5 columns) diodes for the matrix are not needed, everything is handled directly by the MCU.
After soldering everything, there was time to flash the firmware to the MCUs. The supported firmware in this case is QMK . After setting up the environment and building the image, flashing was then very simple and the default key map was working.


QMK key map
Since the Sweep keyboard has only 34 keys, there is a need to use layers and/or combos to be able to access many more available keys. Here again I followed Ben Vallack’s video on his Sweep layouts , adapted to my needs, and created my own QMK firmware/layout:
 GitHub
 The layout used four layers:
- Layer 1 (Base layer, letters)
- Layer 2 (Navigation)
- Layer 3 (Symbols)
- Layer 4 (Audio/Function)
After tweaking and adjusting for a few days, I finally settled on what you see in the repo right now.
Adjusting to split keyboard
After I had all the keys when I wanted them it was time to actually start using the keyboard and typing. On regular keyboard I was averaging around 90 wpm at that time and I was not touch-typing, meaning I was still looking at the keyboard most of the time while typing.
Now with split keyboard I had to learn both touch typing (I had blank key caps!) and adjust to new layout - re-train muscle memory. This was understandably difficult at first: I started at around 30 wpm and it took me 4 weeks to get to a point where I was comfortably typing at 70 wpm.

The typing speed was ultimately slower than on regular keyboard, which to me was understandable. You are going to waste some time on switching layers or waiting for tap-hold timeouts. I also did not try to max out the speed - after all, split keyboards are useful for maintaining an ergonomic position and avoiding RSI , etc., not necessarily to type faster.
Typing on the low profile Sweep was very pleasant - the keyboard is quite flat, the switches are low profile, and I found it much more enjoyable to type than on regular keyboard. There was no need for palm rest as well. There was no stretching finger movements to reach some distant keys.
After some time though, I noticed that for programming, where you need to type lots of symbols, numbers, parentheses, it was a little cumbersome and slow. I also felt like I was missing more thumb keys.
Ergogen and Porcupine
After my initial split keyboard experience with the Sweep, I then started looking for some other keyboard to try. And again thanks to Ben Vallack’s video I discovered Ergogen - Ergonomic keyboard layout generator.
Ergogen is able to generate keyboard PCB layouts, plates and even cases, all using common configuration format. I forked the repo and proceeded to design my own keyboard, tailored to my needs and my hands even!
I started from Ergopad to get the most natural layout for my own hands - using the most relaxed movement, with no lateral jumps. I did add one additional outer column though, just to be able to hit that Tab or ESC key, and 4(!) thumb keys.
Output from Ergopad was then used as input to Ergogen. It was a YAML input file which defined the points for each key, mostly using anchors to position columns and rows nicely using Choc spacing, and also applying the required stagger and splay.
The resulting outline was like this:

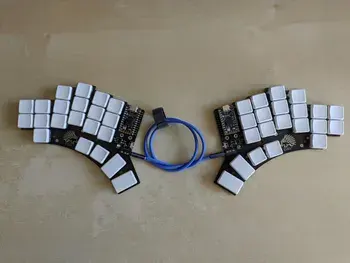
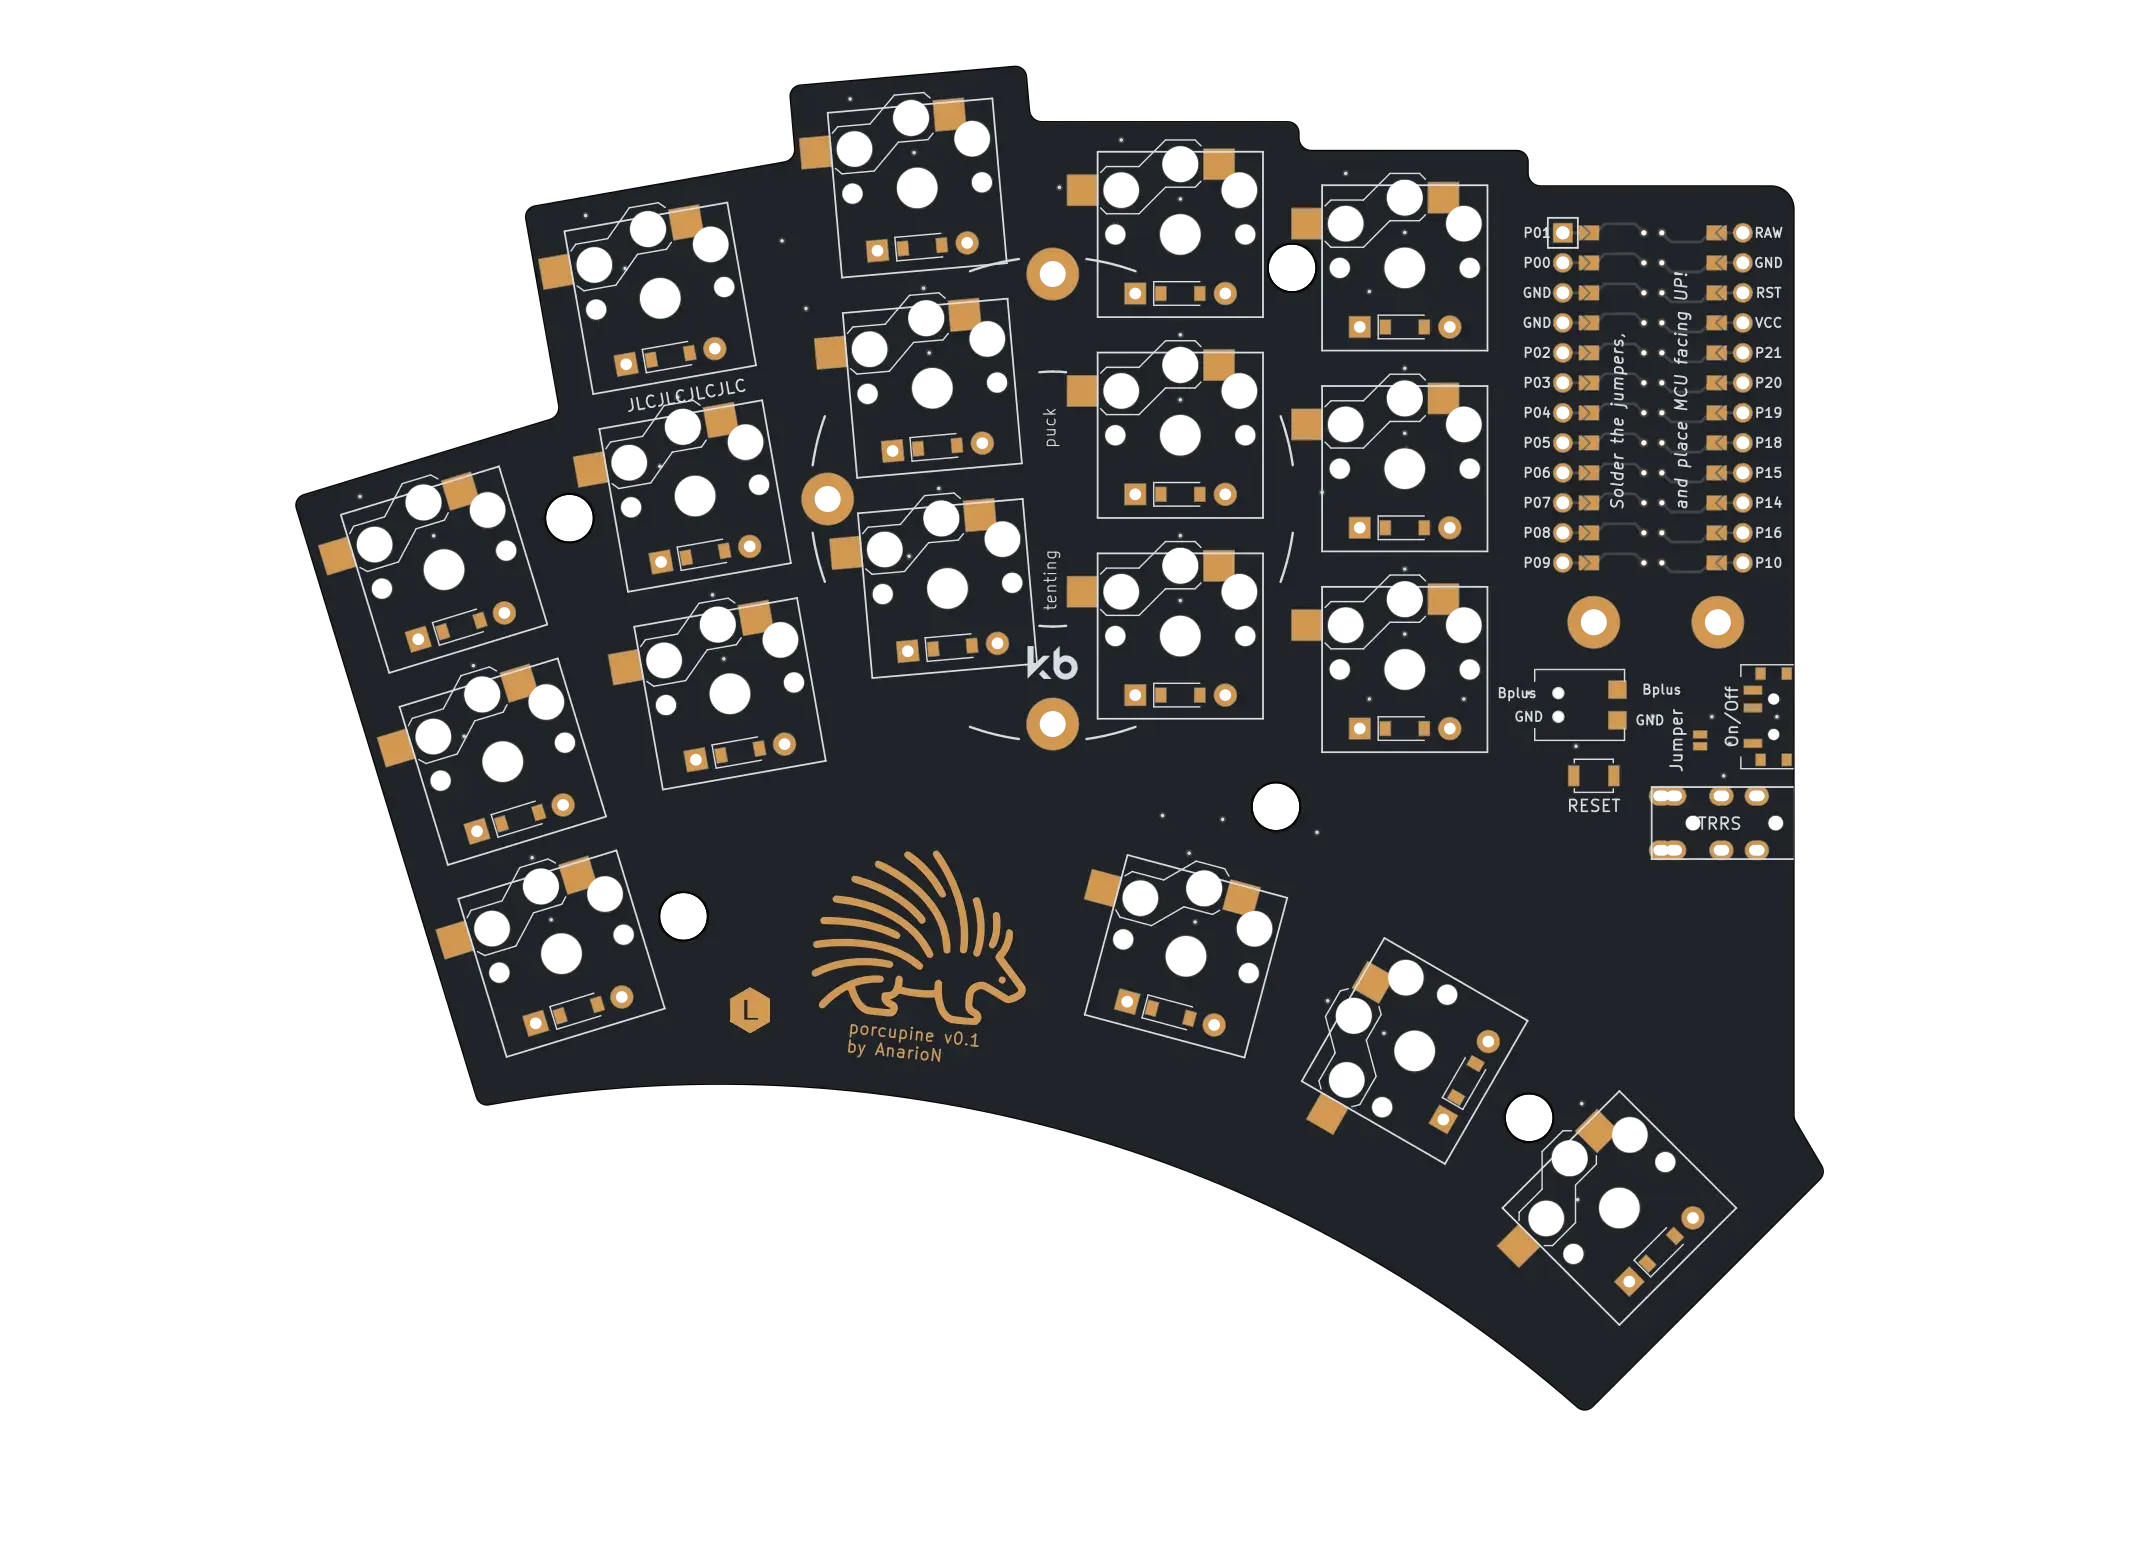
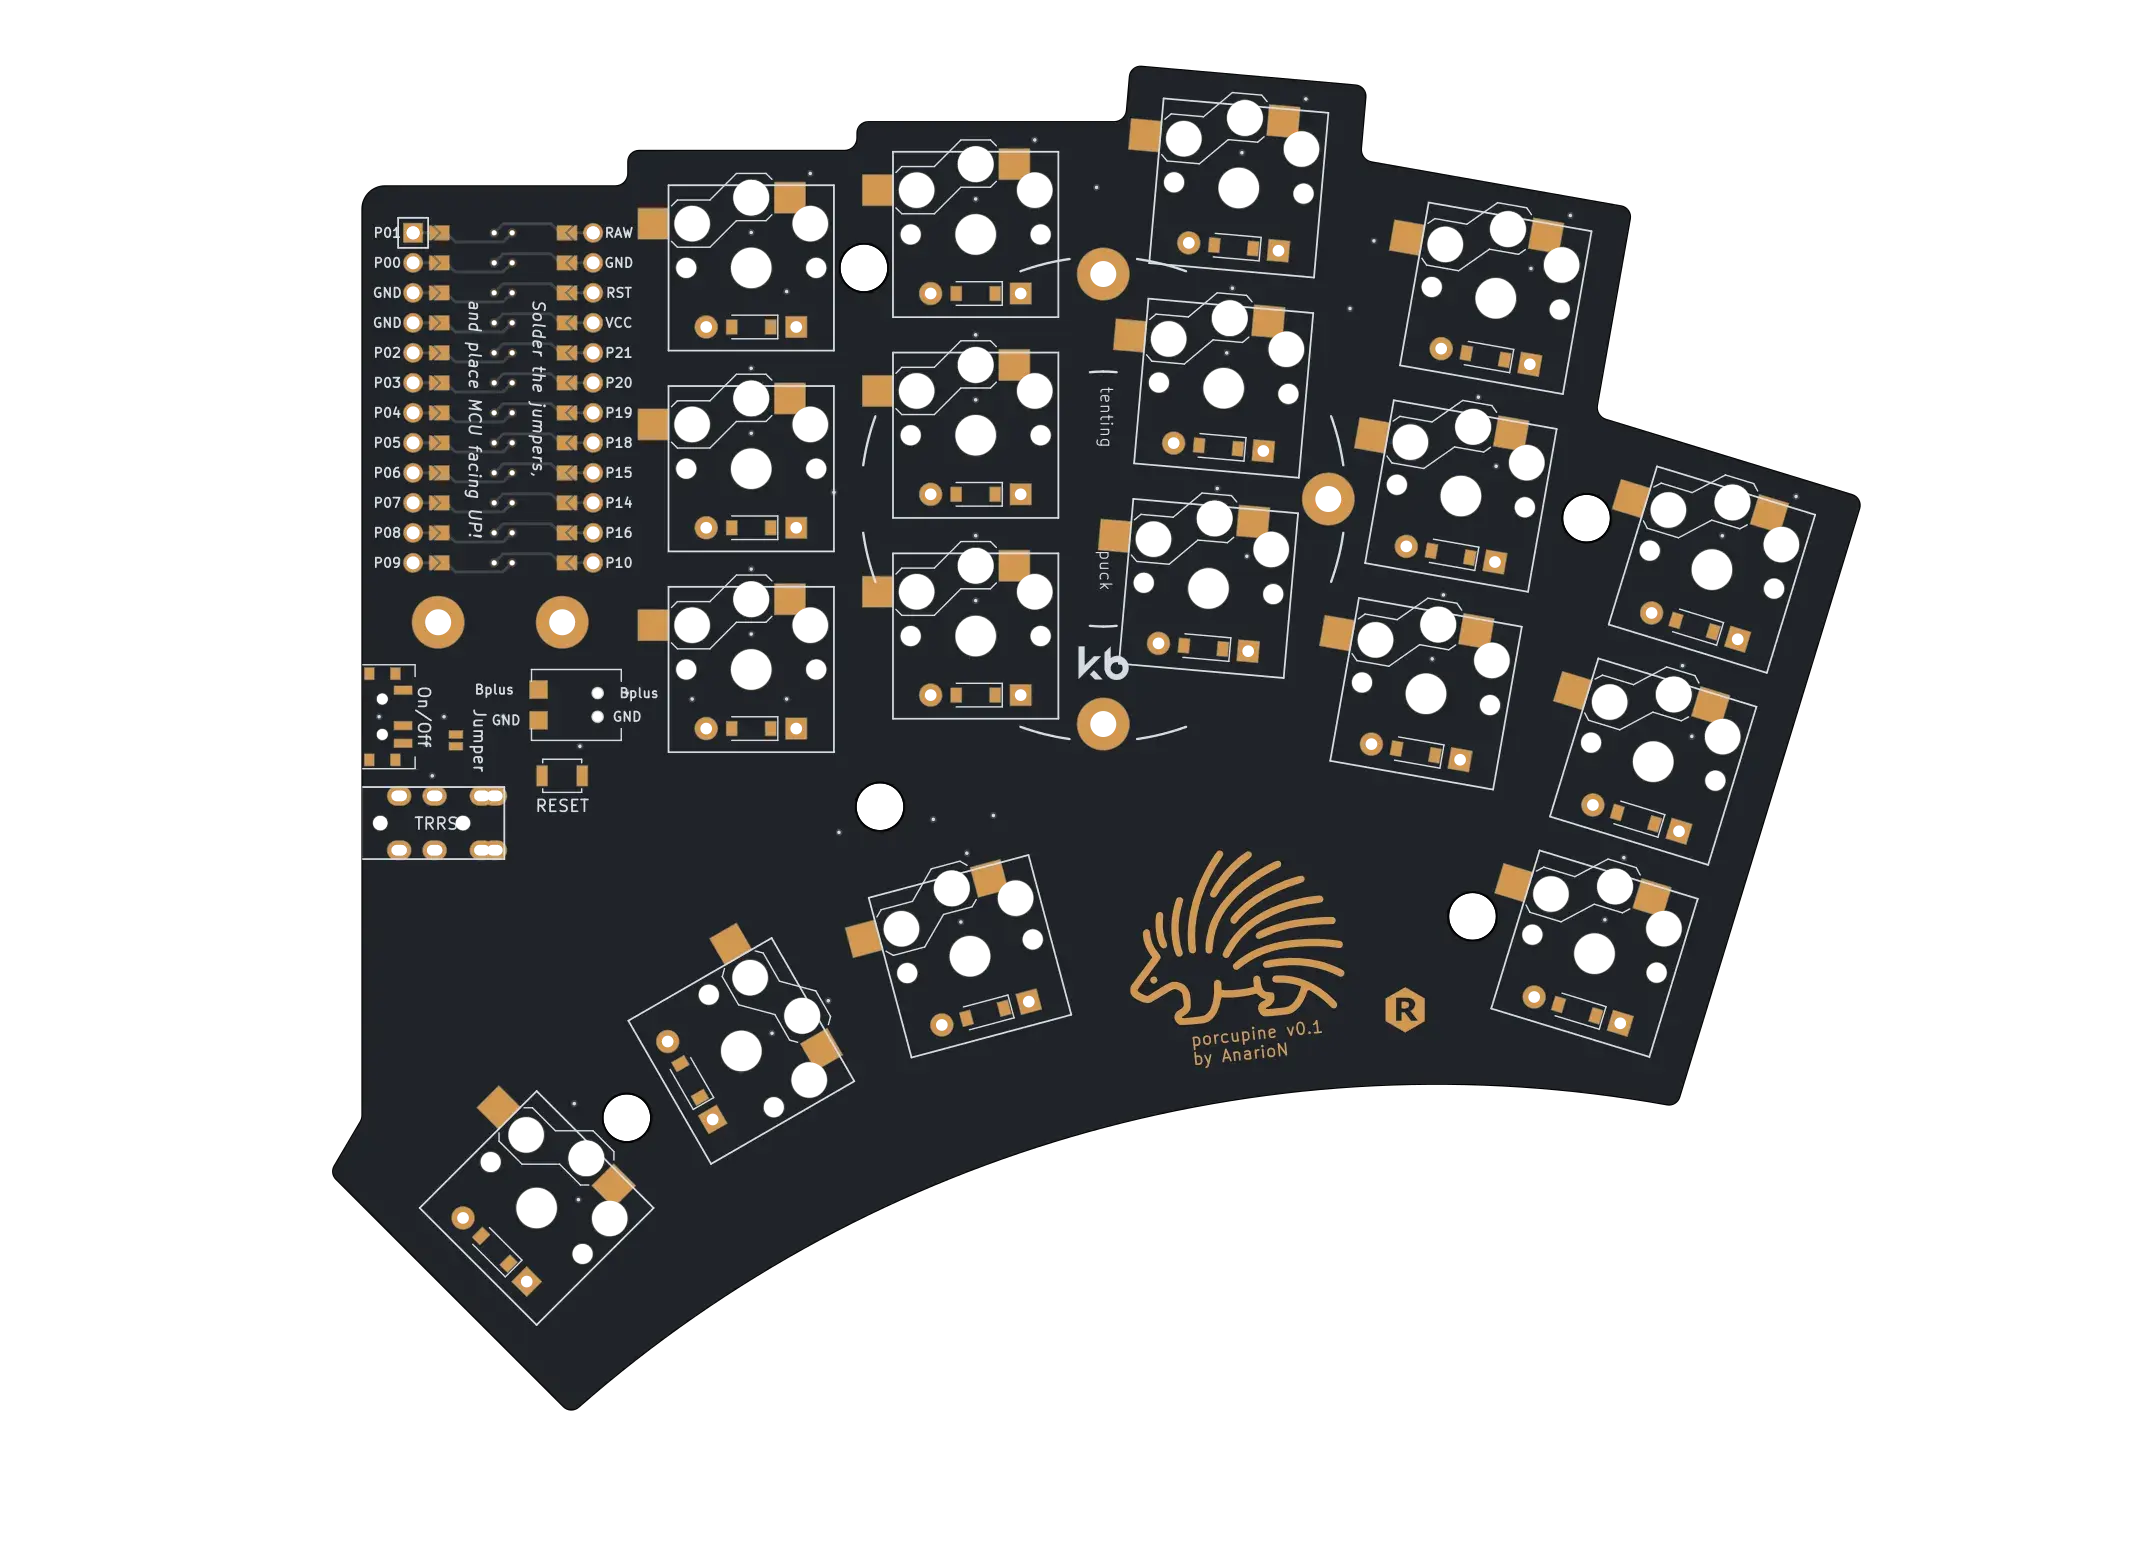
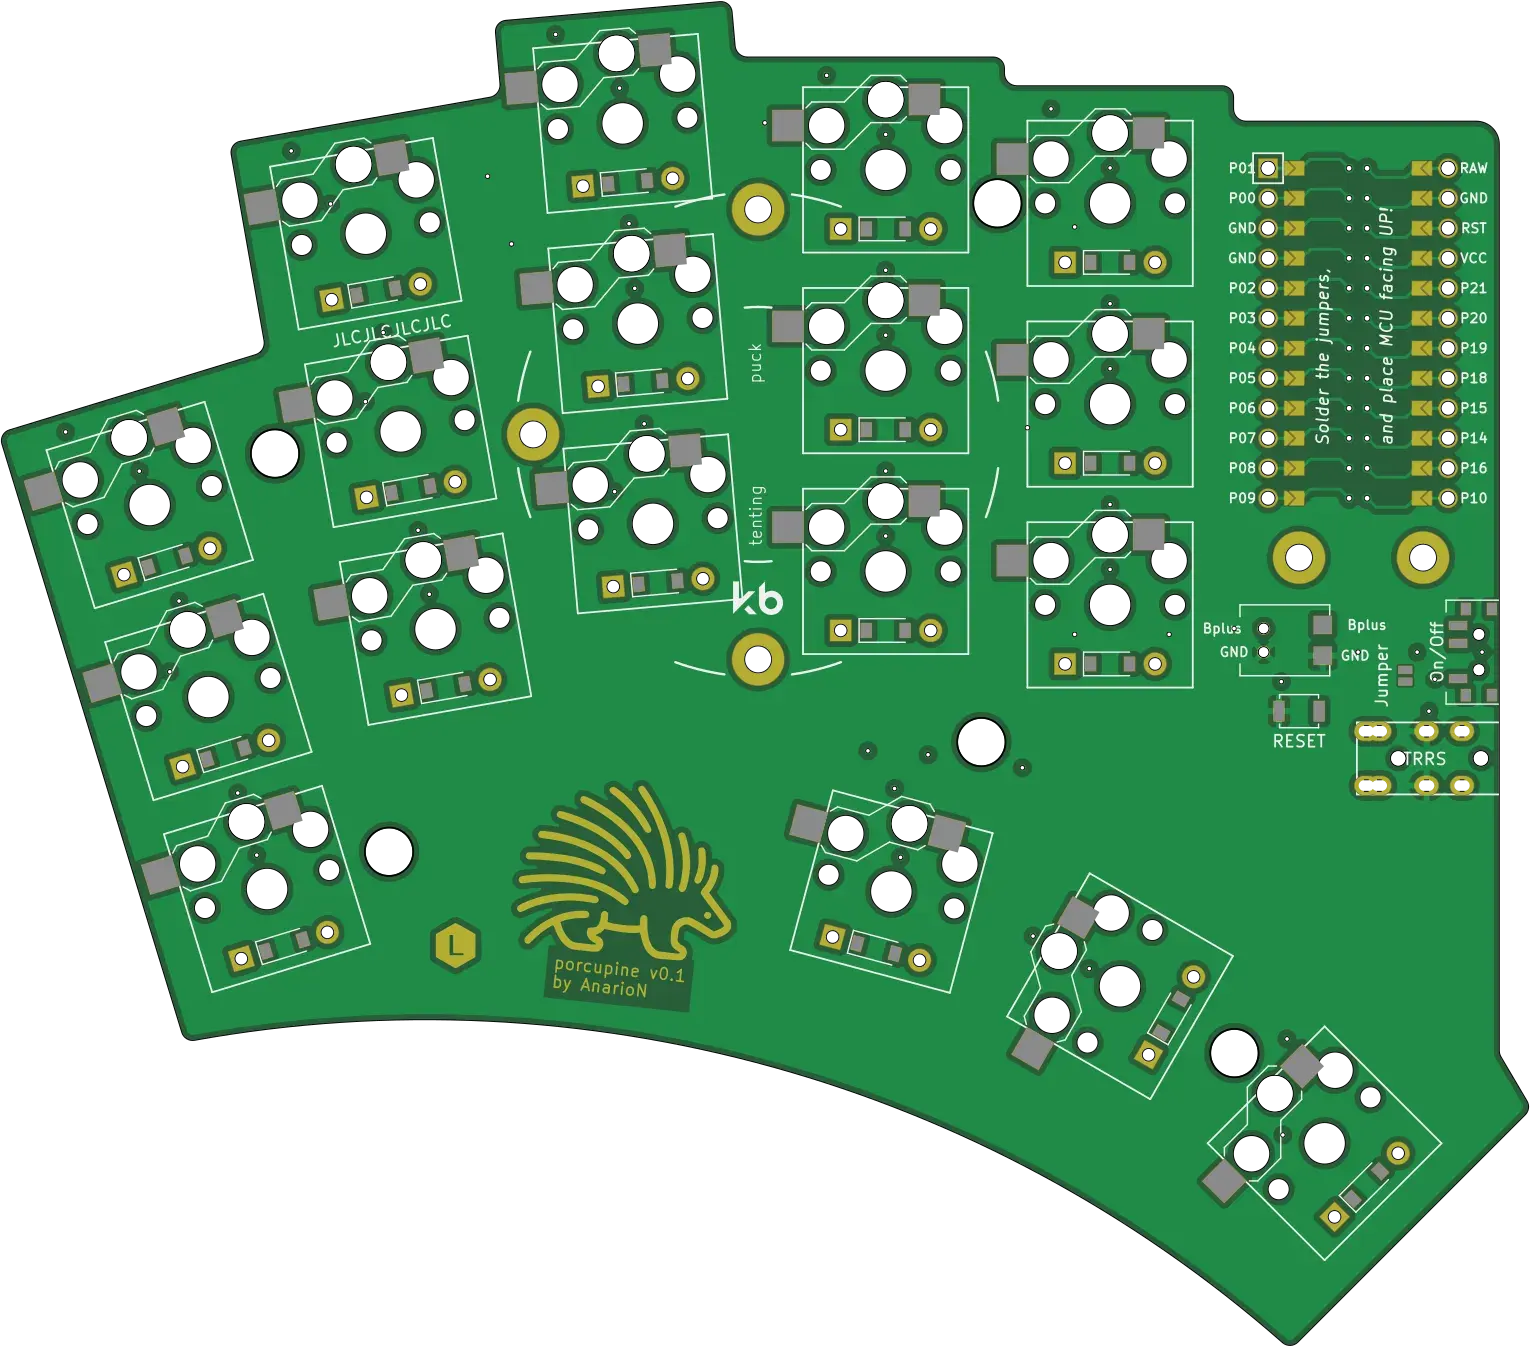
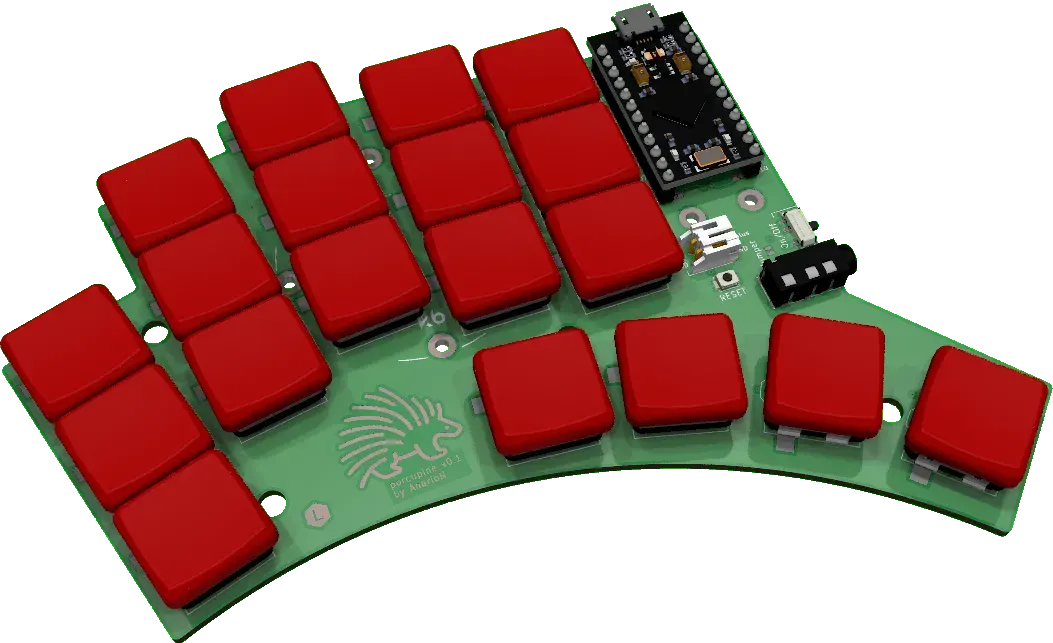
I did not have a name yet for the keyboard, but looking at the outline, I was reminded of a hedgehog, so that was the initial name. Later I changed it again and thus Porcupine was born.
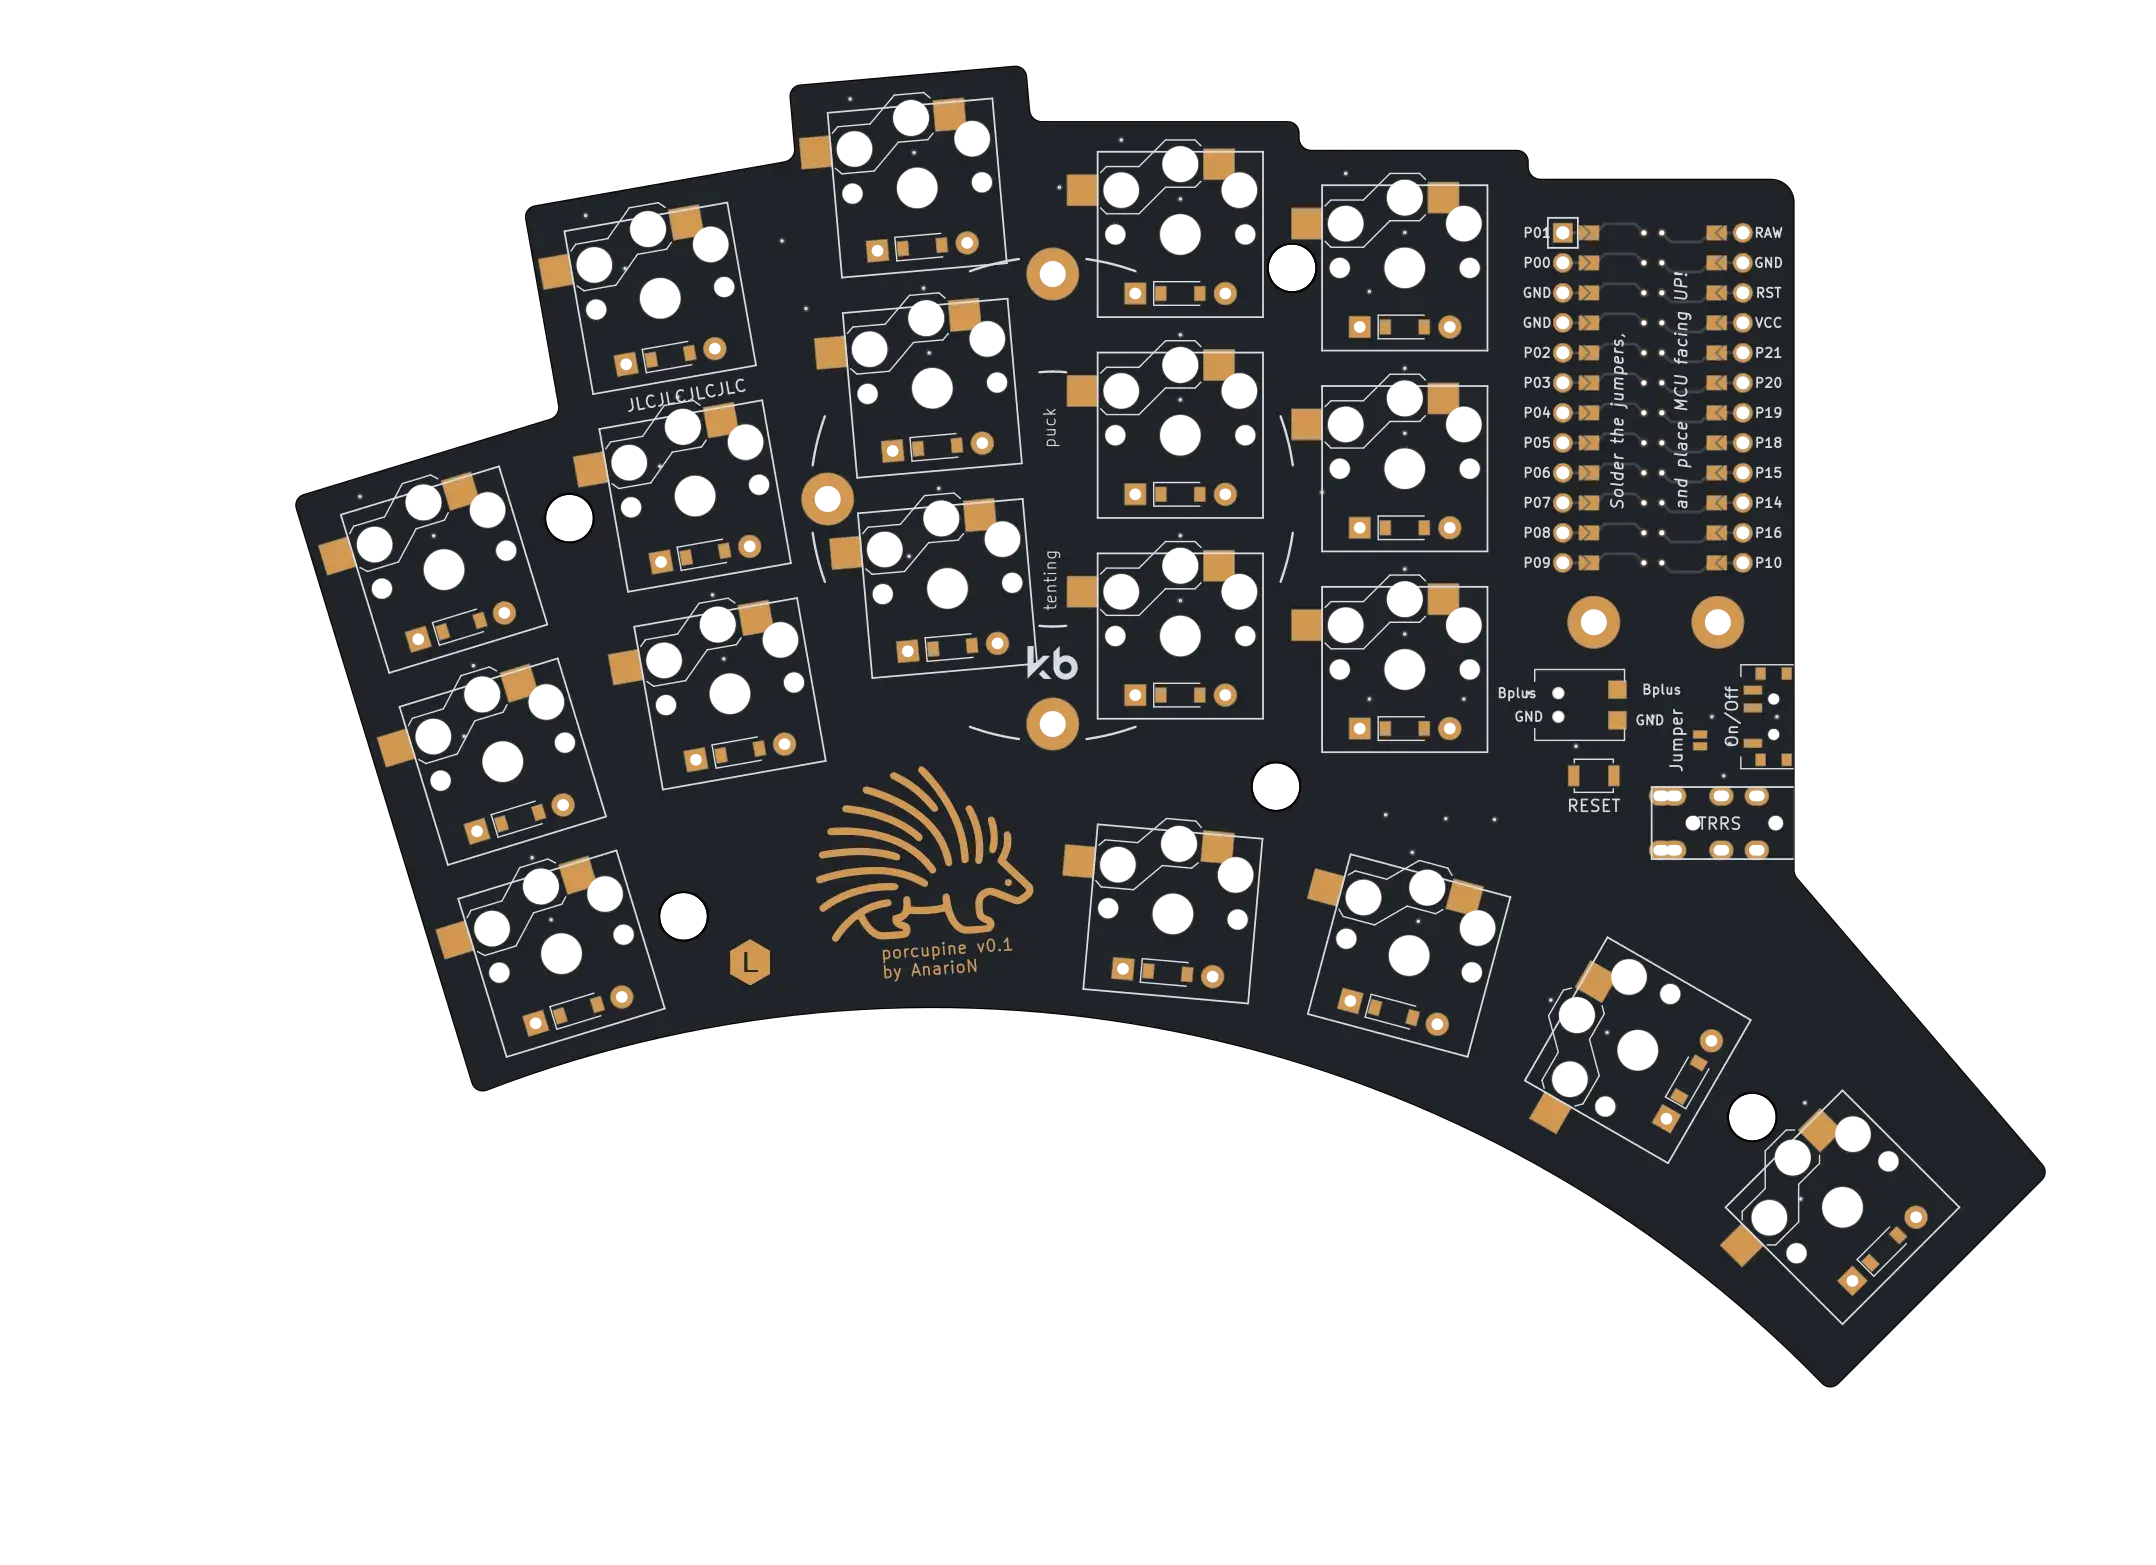
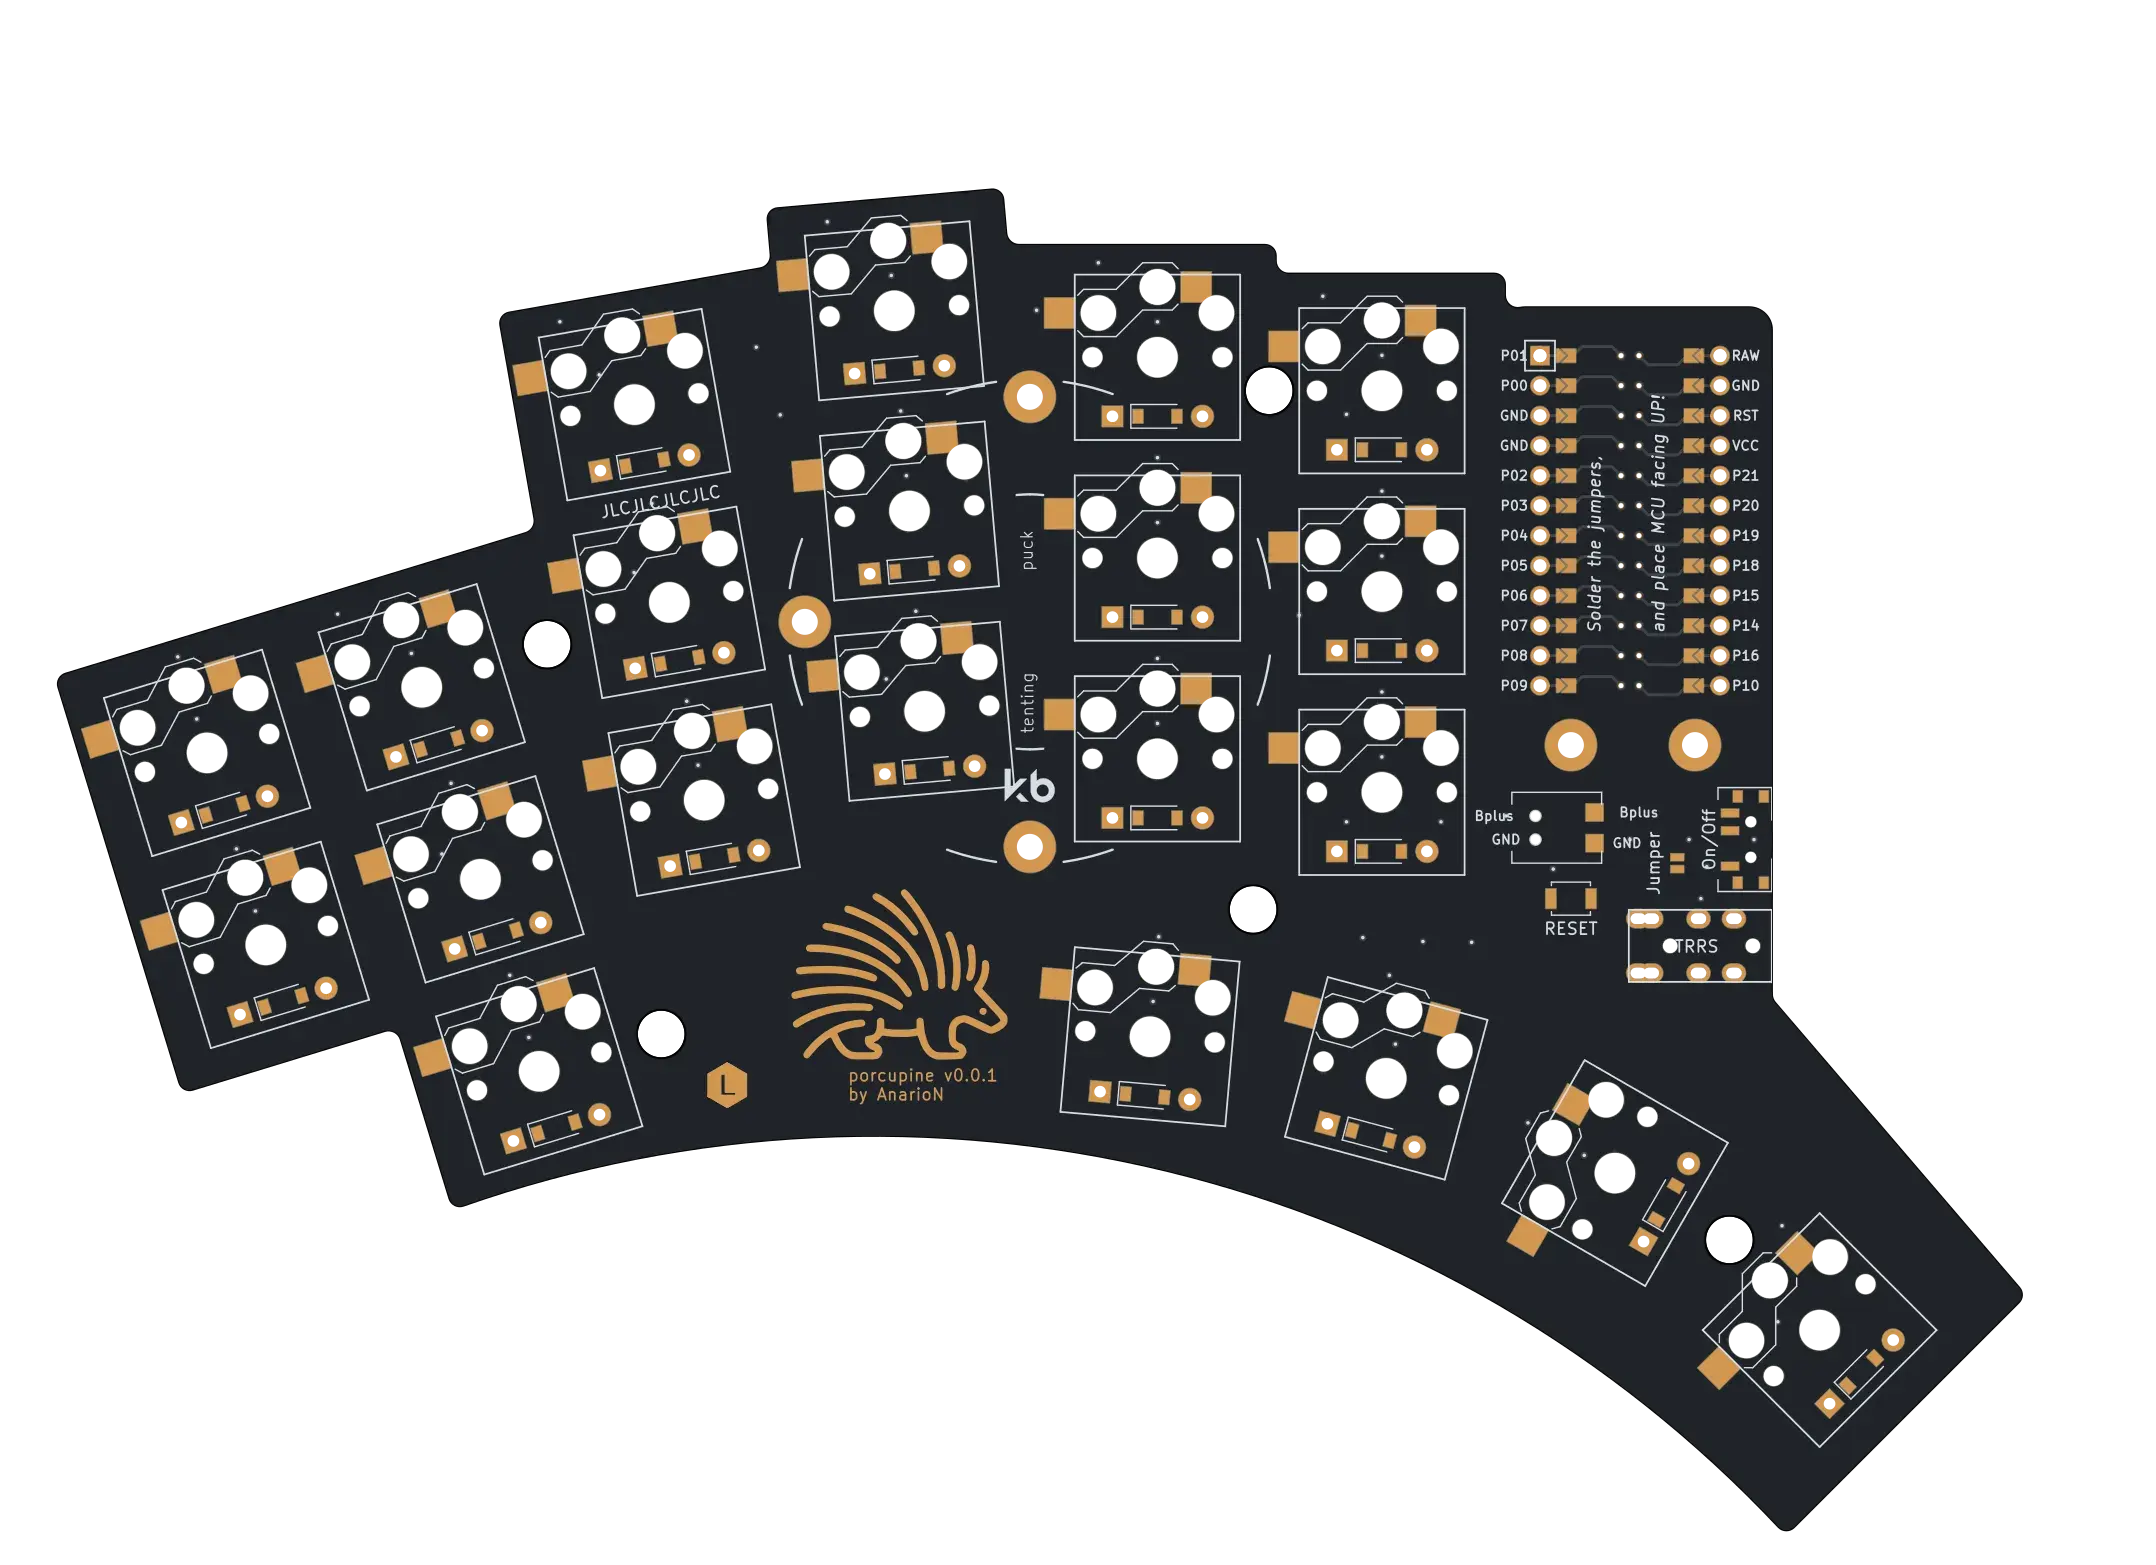
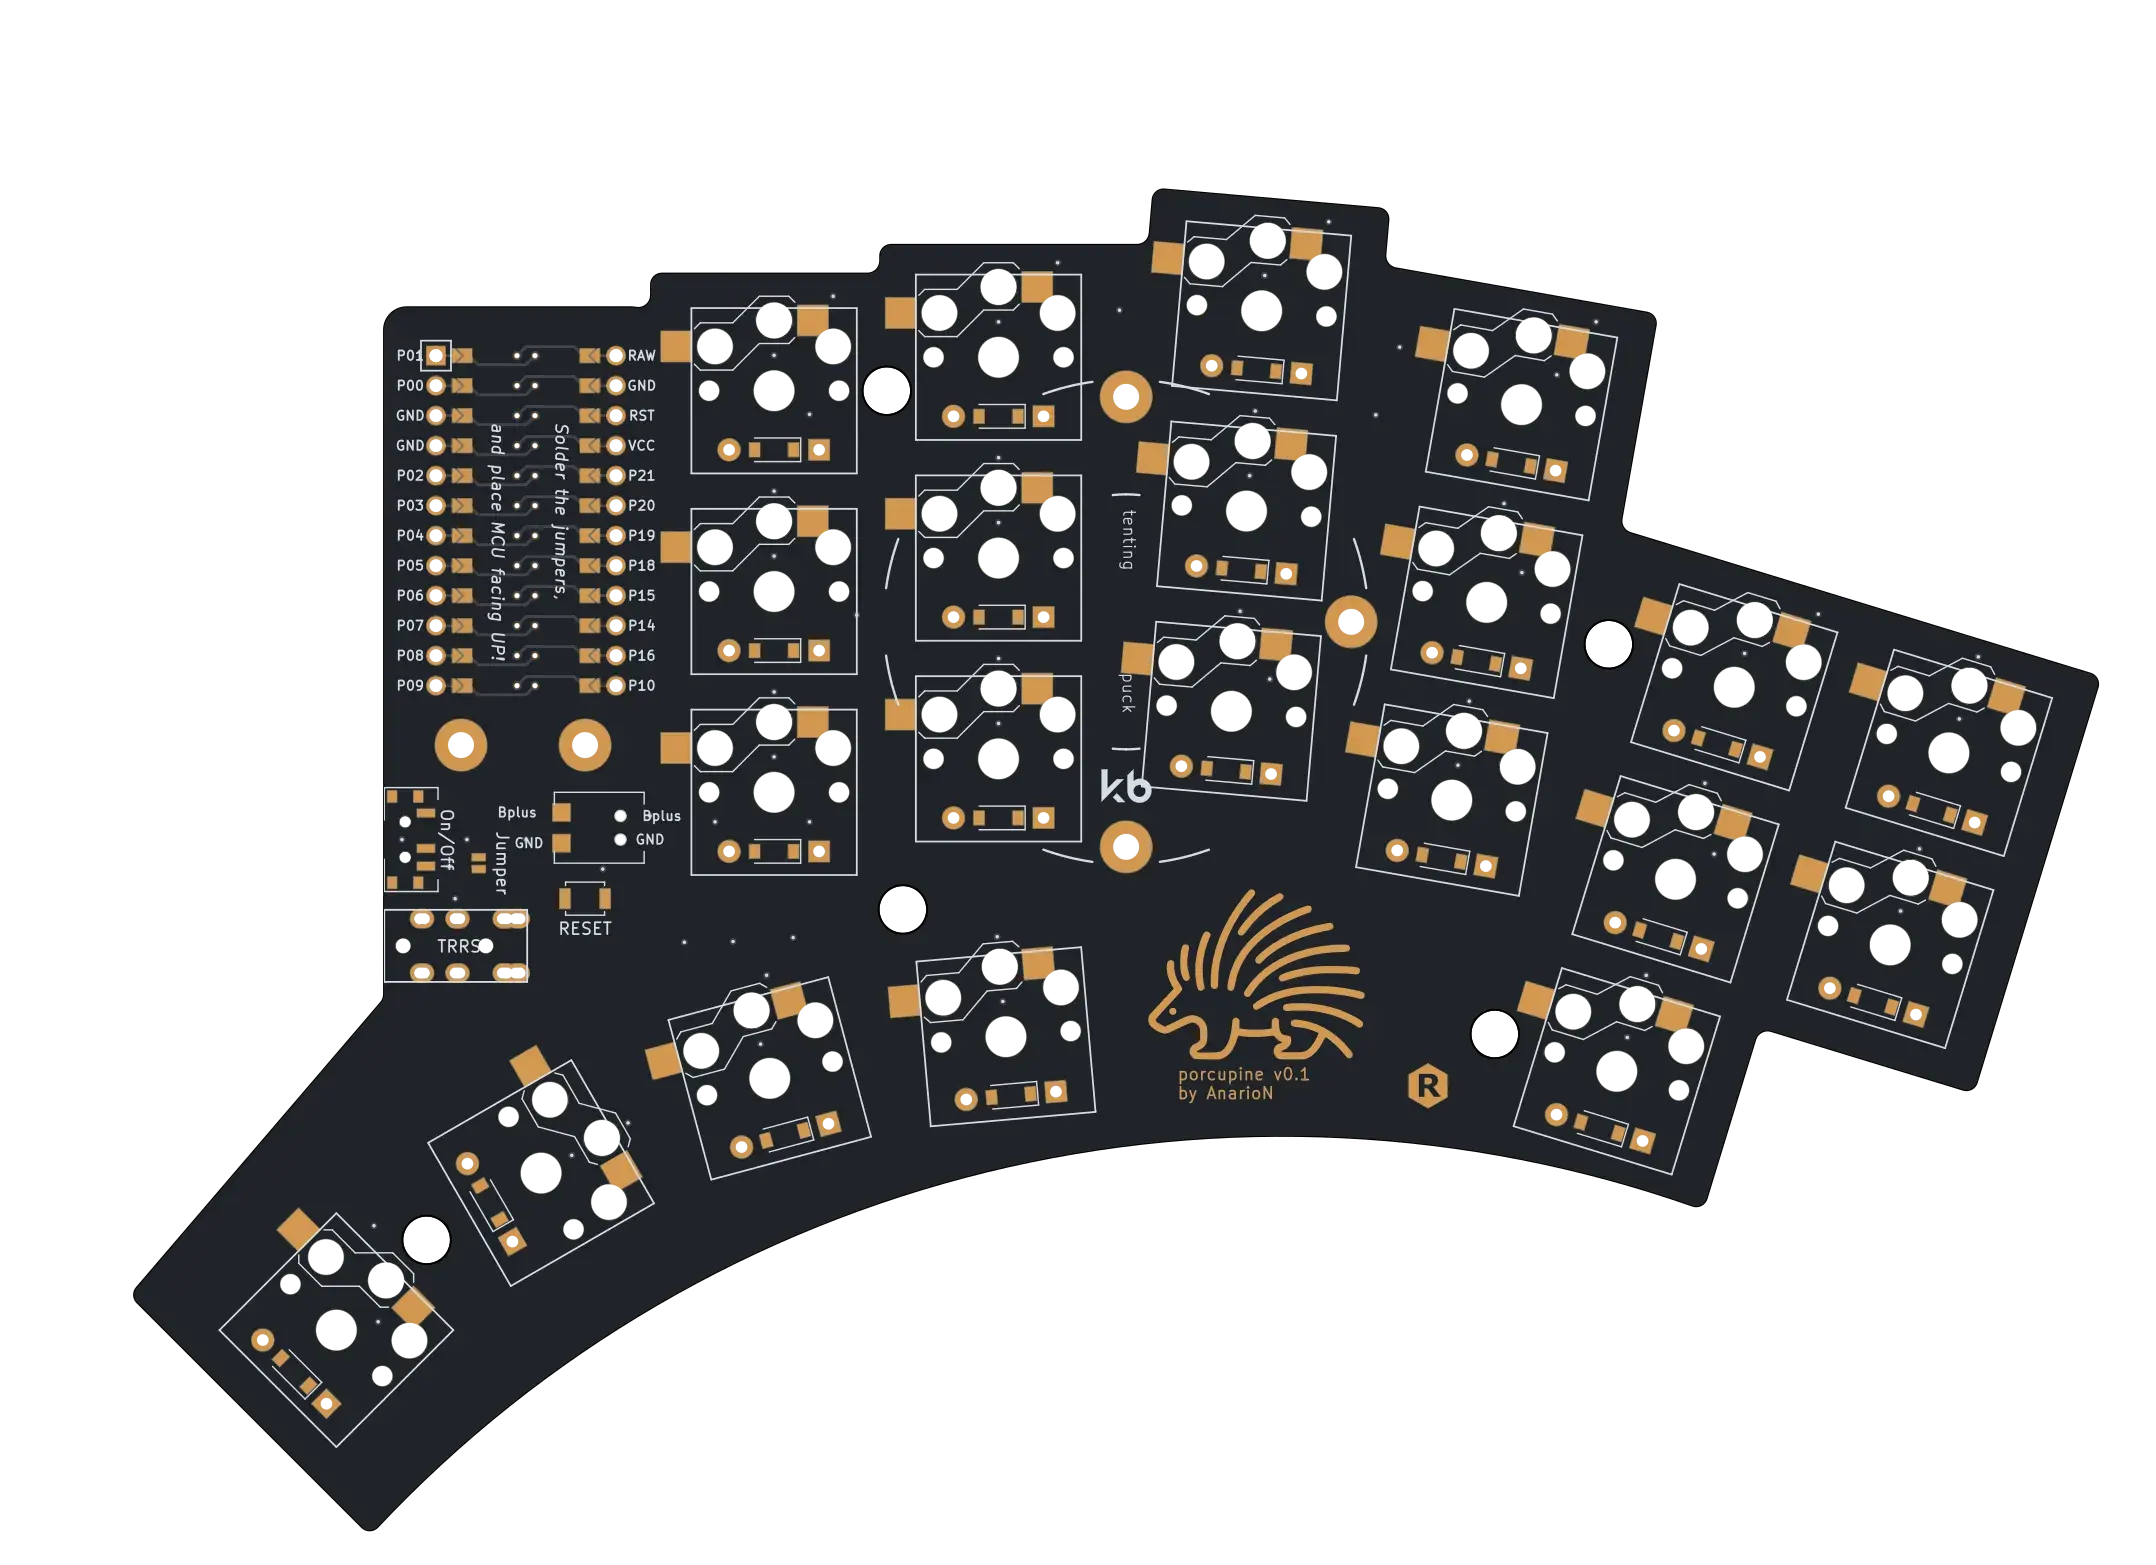
GitHub Moving forward, I added outlines and PCBs to Ergogen in its YAML input file, which were then used for generating plates, mounting holes, key outlines, component outlines and case outlines. In the process I contributed some enhancements upstream, updated the tool to output PCB files in new KiCAD format which came out in the meantime, added some new components and a logo for the keyboard.
In order to save on material and costs, the PCB was made reversible, so that one PCB can be used for left or right side interchangeably. This is mostly thanks to components’ footprints that are reversible and can be placed and soldered on either side.
In the end I created three versions:
- 5x3 column-staggered ortho linear layout with 3 thumb keys (36 keys total)
- 5x3 column-staggered ortho linear layout with 4 thumb keys (38 keys total)
- 6x3 column-staggered ortho linear layout with 4 thumb keys (42 keys total)
Thanks to Kikit and Kibot , I added full documentation package generation: not only PCBs were generated, but also Gerber/drill files, HTML documentation, PCB images and even 3d models:

PCB gallery
Ergogen generated PCBs turned out great, but as you can see above, they were all un-routed. All my attempts to use auto router as an interim automated step have unfortunately failed, so I manually routed all of them:

I sent the files to JLPCB to manufacture the prototype. Since the PCB was now reversible, the mandatory minimum 5 pieces were smaller and thus cheaper ($22,70):


QMK
After soldering, it was again time for the firmware. Since this was now a custom design, the matrix pins and all three layouts had to be defined from scratch. I made the keyboard public and therefore I went as far as getting its own USB Product ID under 0x1209 Vendor ID on pid.codes . For the key map, I went with a similar 4-layer config like for the Sweep.
GitHub With the firmware, the keyboard was completed and officially released.
ZMK
In the custom keyboard firmware space there are two major open source keyboard firmwares - the already mentioned QMK , and ZMK . Without getting too much into differences between them, the one practical aspect where they differ is connection type. QMK is for wired keyboards (both to the host and between split halves), ZMK is wireless (also both to host and between halves).
Nice!nano are popular ProMicro drop-in replacement MCU for custom keyboards and they support wireless operation. I bought two of these and started learning ZMK. It was a little different than QMK, but ultimately, many features are the same. For the default working key map I went with simple trusted 4-layer key map that I already had working.
GitHub With both QMK and ZMK ready, I finally could start using the keyboard and getting adjusted to its splay and stagger, which were not present on the Sweep… And it turned out to be quite difficult for me. As you can see on the pictures above, the pinky finger stagger is quite significant - one full row. On Ergopad simulation that was exactly how my fingers were laid out. In reality though, that is not how my fingers lay on the keys… They are curled to hit the keys more from the top, and the stagger is rather small. I consistently kept hitting Q instead of A on Porcupine and I couldn’t get used to both stagger and splay.
With that, I decided to update Porcupine to version 2.
ZSA Moonlander
I had an intermission though on the custom keyboard path. I was able to buy a used ZSA Moonlander for a good price (~113€), so I switched to it for a time.

Theoretically, the Moonlander should be a quite easy transition from regular keyboard, as it has normal MX keys. In my case, though, I was lost typing on it. It was difficult for me to touch type and not look at the keyboard, the transition was more painful than from regular keyboard to Sweep.
Another thing, common in many reviews of Moonlander, was the thumb cluster. It was position at such an angle, that one has to stretch the thumb quite far to reach those keys, and it quickly becomes tiring. Also, the big red triangular button was very difficult to reach and ultimately unusable.
It was also the first keyboard I had with fancy RGB lighting. I played with the effects for a minute, and then never used or cared about RGB lighting anymore.
As for the key layout, I went with some Home-Row Mods and three other layers. It is on Oryx if anyone is interested.
I gave up on Moonlander after a short period of time, went back to regular keyboard, and started working on Porcupine v2 again.
Porcupine v2
After experiences with original Porcupine, I decided to forgo both the splay and the aggressive stagger. I added some more features as well:
- there would be only one layout now with 6 columns, but the last column could be broken off to have a smaller 5-column variant
- added connection for Nice!view - an OLED display that sits over the MCU
- added roller encoders (optionally horizontal/vertical on opposing sides)
- kept the 4 thumb keys
The thumb cluster was where I spend the most time. Depending on how you place the keyboard, the thumb cluster position needs to be changed for optimal reach. If you keep the keyboard rather horizontally straight, then the default cluster would be fine. But often people rotate the keyboard sides outside (left side counter-clockwise) so as the pinky key has even shorter path to travel - sort of simulating the stagger a bit. With this approach, the thumb cluster moves away and should actually be extended downwards.
I kept printing the layouts, placing them on styrofoam board with switches inserted into it and trying out different approaches. In the end I settled on the following version:

The work so far is available on v2 branch , but it is not finished. I never even created a prototype and I stopped the work when I realized that Porcupine starts to resemble one of the most popular split keyboards - the Corne .
Corne-ish Zen
With that realization I went back to regular keyboard and I simply started to hunt for a good deal on used Corne. They don’t show up very often on r/mechmarket in Europe, but I was able to score one after some time. It was the Corne-ish Zen version - premium, ultra-portable, incredibly low profile wireless split mechanical keyboard. It has a soldered MCU with no socket for additional board that would increase height. I got it for 165€.

And it is beautiful! Very sleek, very flat and comfortable. It immediately felt good for my hands. The keyboard has hot-swap sockets for the switches and my version came with linear Choc Reds which were very good. It also came with flat, slim Choc key caps, which felt strange at first, but I ultimately stayed with them.
With this keyboard, it was time to get serious with key map layout. Corne-ish Zen is wireless, so the firmware has to be ZMK. I really wanted to use home row mods , but given my typing speed, I kept triggering the mods, making for a frustrating experience.
I started reading how people deal with this and I discovered urob’s ZMK config . After loading it on my Corne-ish Zen, everything started working as it should. It really felt like magic - smooth, fast typing, but modifiers still available 150ms away! I forked his repo and started working on my own config.
This time I went for more layers:
- Base (Qwerty)
- Navigation (cursors, tab/app/windows switching, PgUp/PgDn/Home/End, etc)
- Media (Play/Stop/Next track/Previous Track)
- Symbols (self-explanatory)
- Numbers (self-explanatory)
- Function [keys]
- Tap-only (no home row mods, mostly for gaming)
- Adjust (Bluetooth profiles and settings)

I did not go for any combos. I tried them on the Sweep and found them to be quite unreliable - maybe it was the timings, but often regular taps for both keys were registered instead of the combo. Also, it was not very comfortable for me to tap two keys on one hand at the same time.
One issue was the access to AltGr which I need to type some Polish letters. To be able to fluently tap those, I opted for a dedicated thumb key and it has been working fine. Not great, but fine. Fortunately I don’t have to use those letters very often.
Dilemma Max
Soon I had another intermission: on Reddit’s /r/mechmarket someone was selling BastardKB Dilemma Max keyboard so I bought it to try out (100€).

It was a version with Choc switches, so low profile, which I like very much. It also has one, new on my journey, distinct feature, which is a built-in Cirque trackpad. The keyboard is nice and flat, even though not as small as Sweep or Corne. It came without key caps, so I threw whatever I had lying around on it, and since I usually have sets for smaller keyboards, it ended up with three different types of key caps.
The keyboard is wired and using QMK, so I went back to the QMK world and tried to apply the latest layout I had in ZMK for the Corne-ish Zen. Unfortunately, I was not able to achieve the same error-free fast typing as on the Corne… Even using the latest features from QMK, the typing was not as smooth and I often had modifier misfires. This was one setback which couldn’t let me enjoy the Dilemma.
The built-in Cirque trackpad was also underwhelming. Perhaps it was again due to QMK support or improper setting/optimizations, but I found it jumpy, not precise and sometimes lagging. I am not a trackpad user anyway, so this was not a big deal, but if the experience was different, maybe it would be possible to ditch the mouse.
Another issue was the key spacing. For some reason the keyboard has MX spacing (19.05 mm between the centers of adjacent switches), but is using Choc switches (which have 18 mm spacing). What that meant for me coming from tight and compact keyboards like the Sweep and Corne, was that I kept hitting the keys off-center, more on the edges, and I couldn’t get past this. It was not pleasant at all and was breaking my flow. The slightly more pronounced pinky key stagger is something I could adjust to in the end.
Lastly, the switches. Choc Purples are very light - 25±10gf operating force - and it was too light for the keyboard for me. My sweet spot is Choc Silver (40±10gf) so on this keyboard I was inadvertently hitting other keys just moving over them.
Perhaps the keyboard can be “salvaged” (see below for the QMK issue), keys swapped for stronger ones, or for MX keys altogether, but since I don’t think the keyboard is how-swap, I did not want to bother with re-soldering switches to just check, so I put the keyboard into the drawer.
Kinesis Advantage 360 Pro
At some point, another opportunity showed up and I was able to buy Kinesis Advantage 360 Pro Bluetooth keyboard (~482€). Not so cheap this time, but it is one of the top of the line ergonomic keyboards. It is again wireless and running ZMK, which is what I wanted after having created my layout for Corne-ish Zen.

Kinesis is not a small keyboard, it has 5 rows of keys and big thumb clusters with 6 keys. It is the first keyboard I had with concave keywells and this turned out to be one of the best features of the keyboard for me. It has MX keys, but thanks to the curvature it is so natural to type, so easy to reach all the keys without too much finger travel. I have a version with linear, quiet Kailh Box Pink switches and it is great, absolute joy to type!
I like the fact that it has the number row and just enough keys in the bottom row to cover all my symbol needs for programming without having to use layers for them. I only use 2 thumb keys out of 4 on each hand though.
People sometimes complain about Bluetooth connection problems with this keyboard, connection lost and unable to reconnect, or frequent disconnection/connection cycles. I experienced exactly the same thing, on both Windows and Linux and was disappointed and worried that the keyboard will not be usable. The issue however was simple to resolve - I just needed to connect the external Bluetooth/WiFi antenna that came with the motherboard… Since then zero connection problems.
The only gripe with the keyboard I have is that it is big in the height aspect. It is very nicely profiled, there is room for palms to rest, it has built-in tenting solution, but all that makes it quite tall. Even the height difference between typing and the switching to mouse which is lower, is a little awkward. I am dealing with this by lowered the desk more than usual, but it is not perfect. It would be perfect if the keyboard was immersed in the desk, which some people do by having a whole in the middle, but that is not something I would do.
Other than that the keyboard is excellent. Battery is big enough to not worry about charging at all, I do it every couple of months. I have been using it daily for months now and it is my endgame keyboard (so far 😄).
Here is my ZMK config for both Corne-ish Zen and Kinesis Advantage:
GitHub
ZSA Voyager
There is one more premium keyboard in the ergo split space, and that is ZSA Voyager . Again, I wanted to try it out, so when there was opportunity, I bought a used one for 333€.

Voyager is another low-profile split keyboard with all the goodies: hot-swap, RGB lighting, web-based configurator. It does have more keys, specifically the top number row which I grew accustomed to on Kinesis and two thumb keys, which I also limited myself to use. It is then very similar to the Corne, just with the added top row, and minus the most tucked in thumb key. Typing on it is also similarly pleasant with keys easy to reach without too much finger travel.
I have the version with Kailh Choc Pro Red which are linear and rather light (35±10gf) so they suit my very well. They could however be more quiet. I should get some Ambients Silent Twilight switches for it.
Voyager is a wired keyboard running on QMK. Mindful about Dilemma QMK issues I was now determined to get it working like on ZMK. There were even more developments in QMK since my Dilemma trials (Achordion/Chordal Hold/Tap Flow) so there was a chance. This time I started out from excellent QMK keymap by getreuer which had a lot of useful features already, too many actually, as I don’t use combos for example. I got the firmware running on my keyboard pretty quickly and it was already much better than before.
I am using a very risky approach with one of my thumb keys - combining both Enter (on tap) and Shift (on hold). It is great for usability, as I mostly use just this one thumb key on the right side, but one needs to have the timing exactly right so as not to accidentally tap Enter, when you want to type something like this:
rm -Rf /home/user/Documents/Somethingand you are off by milliseconds at the D…
Don’t try this at home! I am very happy with this setup (so far 🤣). But to get it working nicely, especially to be able to roll off keys quickly, I needed some special arrangements. Basically I needed to prioritize the hold (Shift key) in almost all cases. That was achieved via a combination of Permissive Hold , Chordal Hold , and get_hold_on_other_key_press specifically for those thumb keys
Another issue were the navigation keys on the Nav layer. They are dual purpose:
- tap: ⬆️, hold: Ctrl+Home (beginning of document)
- tap: ⬇️, hold: Ctrl+End (end of document)
- tap: ⬅️, hold: Home (beginning of the line)
- tap: ➡️, hold: End (end of the line)
Additionally, I wanted to use key repeat on those keys and also be able to tap really quickly to move around using arrows. This was pretty easy on ZMK, but quite difficult on the QMK. In the end I added some custom handling specifically for those keys, including measuring the time between taps to check if this is quick repeat, etc.
With all that, I was finally able to type quickly, without triggering mods inadvertently, just like on ZMK!
My resulting QMK config is here:
GitHub
Summary
I have gone through quite a few keyboards, trying out new things and learning along the way. Many people are happy with the keyboards that I found difficult to use, so don’t be deterred on your own journey of trying to find the perfect keyboard. Keep trying and exploring until you find something that works for you.
In the end, I am back to Kinesis. I have not dedicated enough time to the Voyager yet, to consider switching to it permanently. That is something I still need to do.
Following the ergo split keyboard landscape, there are perhaps two more keyboards I would like to try some day. The first one is Dactyl Manuform - a 3D-printed keyboard that you can customize quite a lot using the configurator. One of those days I will dust off my 3D printer and make one for myself.
The other one is anything using the new Ultra Low Profile Cherry MX ULP switches, like this one - incredibly thin! There are not that many commercially available split keyboards with those switches yet.
If you want to start your exploring the topic of split keyboards, this is a good starting point with many of the keyboards in one place:
GitHub
Thanks for reading!